
Assuming your domain is registered with us, and you use our default nameserver templates.
WARNING: No Warranty nor free support is provided in this area. DNS changes can take 48 hours to propagate, and the same time to fix any mistakes you make. DNS CHANGES CAN AFFECT BOTH EMAIL AND WEBSITES IF INCORRECT. Please get in touch if you would like us to make these changes for you.
Adding a DNS Zone Record
- Log in to the Website builder
- Click the Domains / Emails, button in the main menu links on the left side of the page.
- On the page that follows your domain/s will be listed. Select your domain, (or click the DNS Settings button - Fourth Icon along beside the domain name to jump to step 4)

4. Click the option DNS - Nameserver Management (screenshot below)
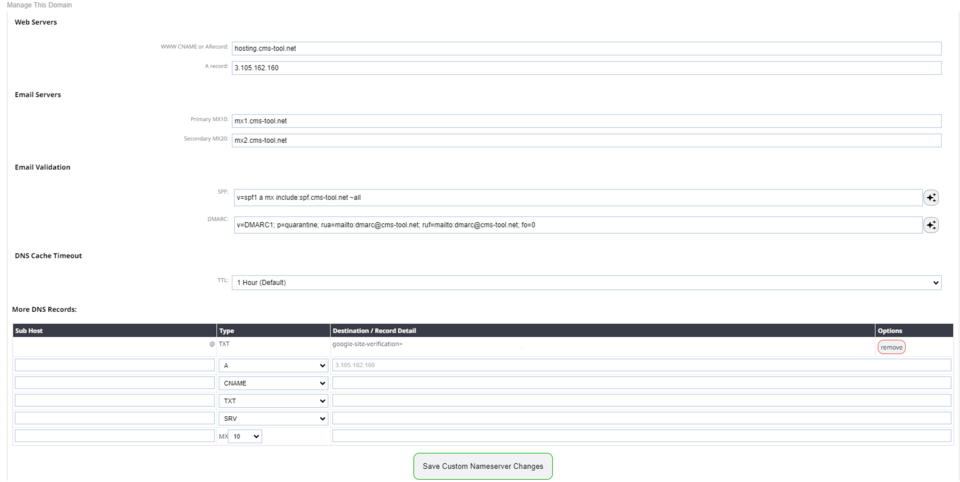
5. Click the Edit Zone Records (Advanced Users) on the right hand side to edit your DNS settings
6. Make changes as required.
7. Save and wait a minimum of 1 hour
DNS changes take up to 48 hours to take effect.
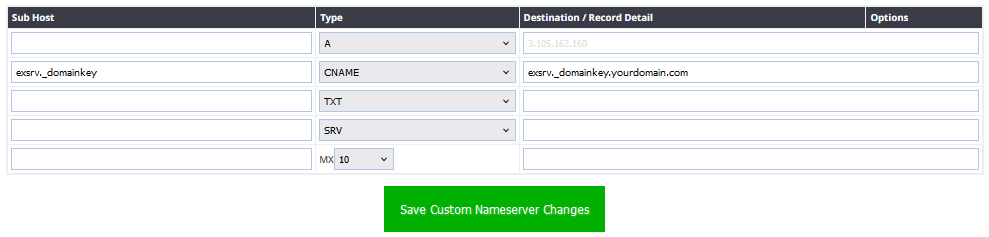
Adding a CNAME verification record
CNAME record
When entering the domain part of the NAME value, you do not need to add the yourdomain.co.nz section as you are in the DNS area for yourdomain.co.nz
WARNING: No Warranty nor free support is provided in this area. DNS changes can take 48 hours to propagate, and the same time to fix any mistakes you make. Worst case scenario, you get no email and no website for 48 hours, and it will cost you 1 hour for us to fix it for you. END WARNING
Adding a Google Text Verification Record
- Log in to the Website builder
- Click the Domains / Emails, button at the top of the page.
- On the page that follows your domain/s will be listed. Select your domain, (or click the DNS Settings button - Fourth Icon along beside the domain name to jump to step 4)
- Click the option DNS - Nameserver Mangement (screenshot below)
- Click the Enter a TXT verification code button found on the right-hand side. (screenshot below)
- Make changes as required.
- Save and wait a minimum of 1 hour
- DNS changes take up to 48 hours to take effect.
Notes:
- We really encourage users to use our default nameserver templates. It makes life simpler for everyone
- 3rd party sites like Google encourage you to make changes to your domain name to prove ownership. 3rd parties sites, although popular and although we encourage use of some of their services, the cost of implementing "integration", and "fixing issues" remains with the customer.
- We provide DNS maintenance features for your benefit, however, these require a competency to use, and fixing mistakes is time consuming. We warranty that our system works. We do not warranty to fix mistakes of data entered incorrectly.
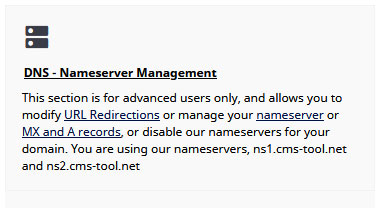
Step 4 Screenshot - The DNS Management Option
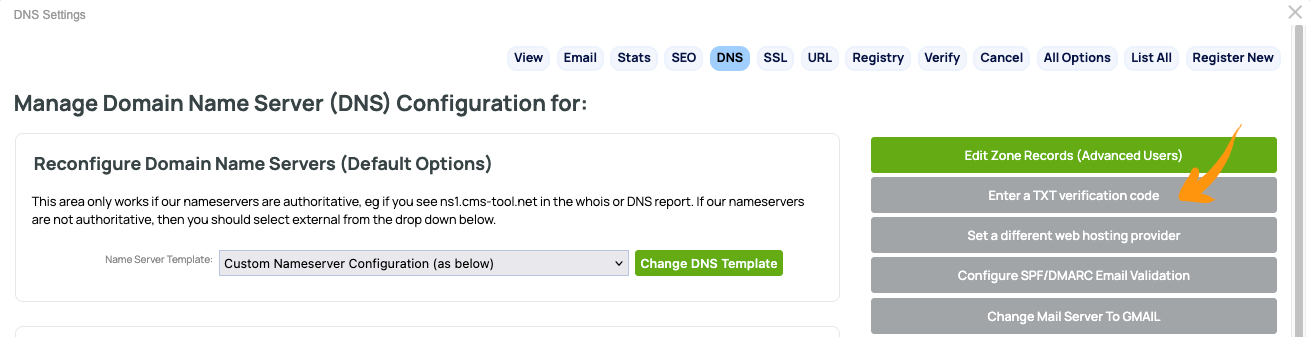
Step 5 Screenshot - Where to enter the TXT verification code