
Gallery Pages
Gallery pages provide options for large format thumbnails with the large resolution image on the following page or popup.
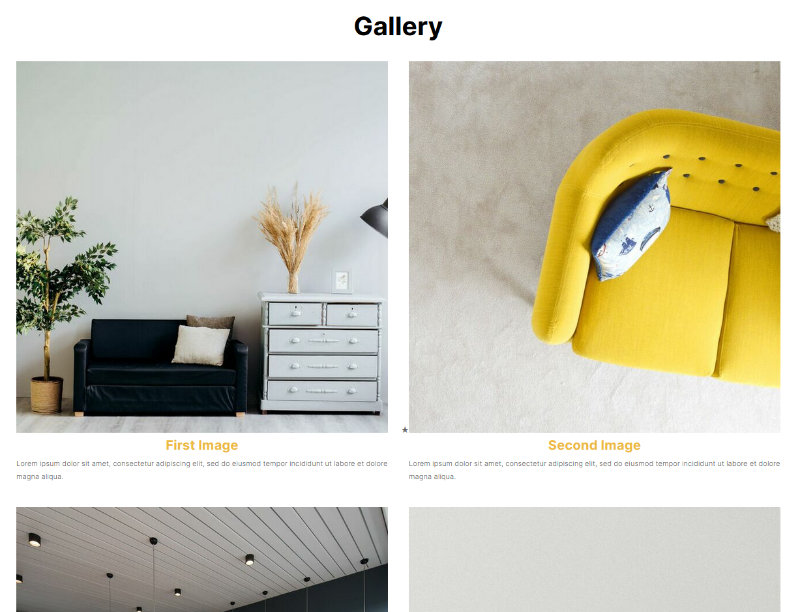
Example Gallery Layout - Flexible Grid, with the thumbnails set to Square (via options tab) Clicking an item will take you through to the full image with detail or popup the image depending on layout.
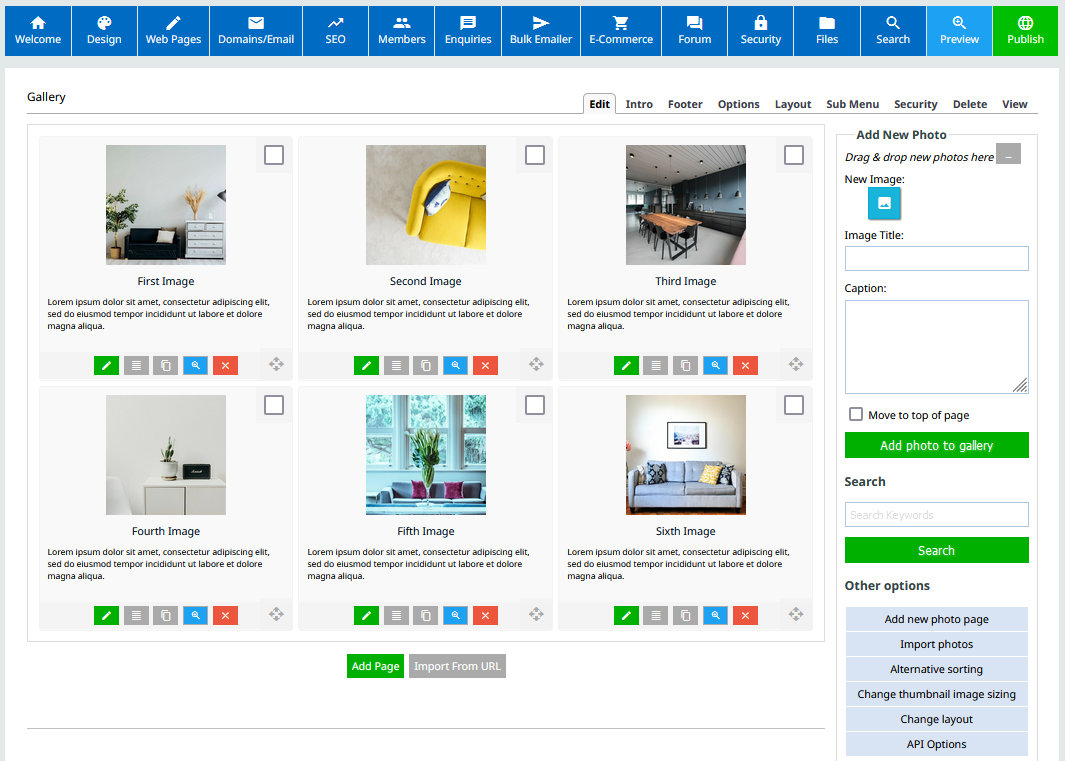
Managing the Gallery content in the CMS
Adding a new Image to the Gallery
To quickly add a new image. Find the image in your computers file explorer and drag the file into the Gallery Page sidebar, dropping it in the DRAG AND DROP IMAGE box found there. This will upload the image. You can then set an image title and caption if needed, and click the green ADD PHOTO TO PAGE button.
Alternatively you can browse for an image by clicking the blue image icon.
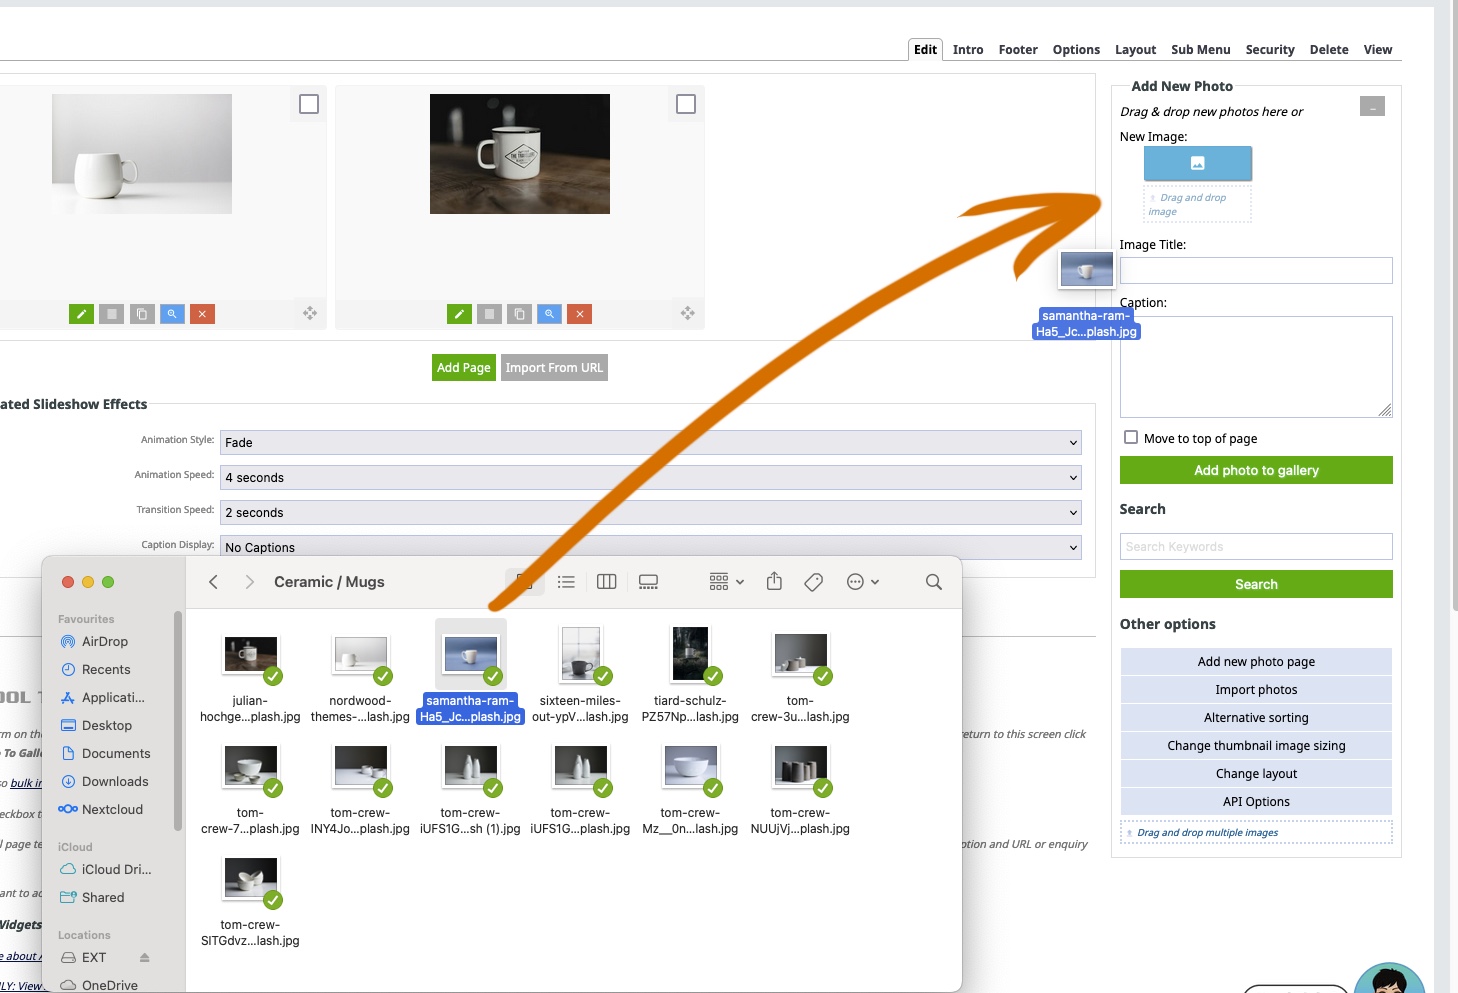
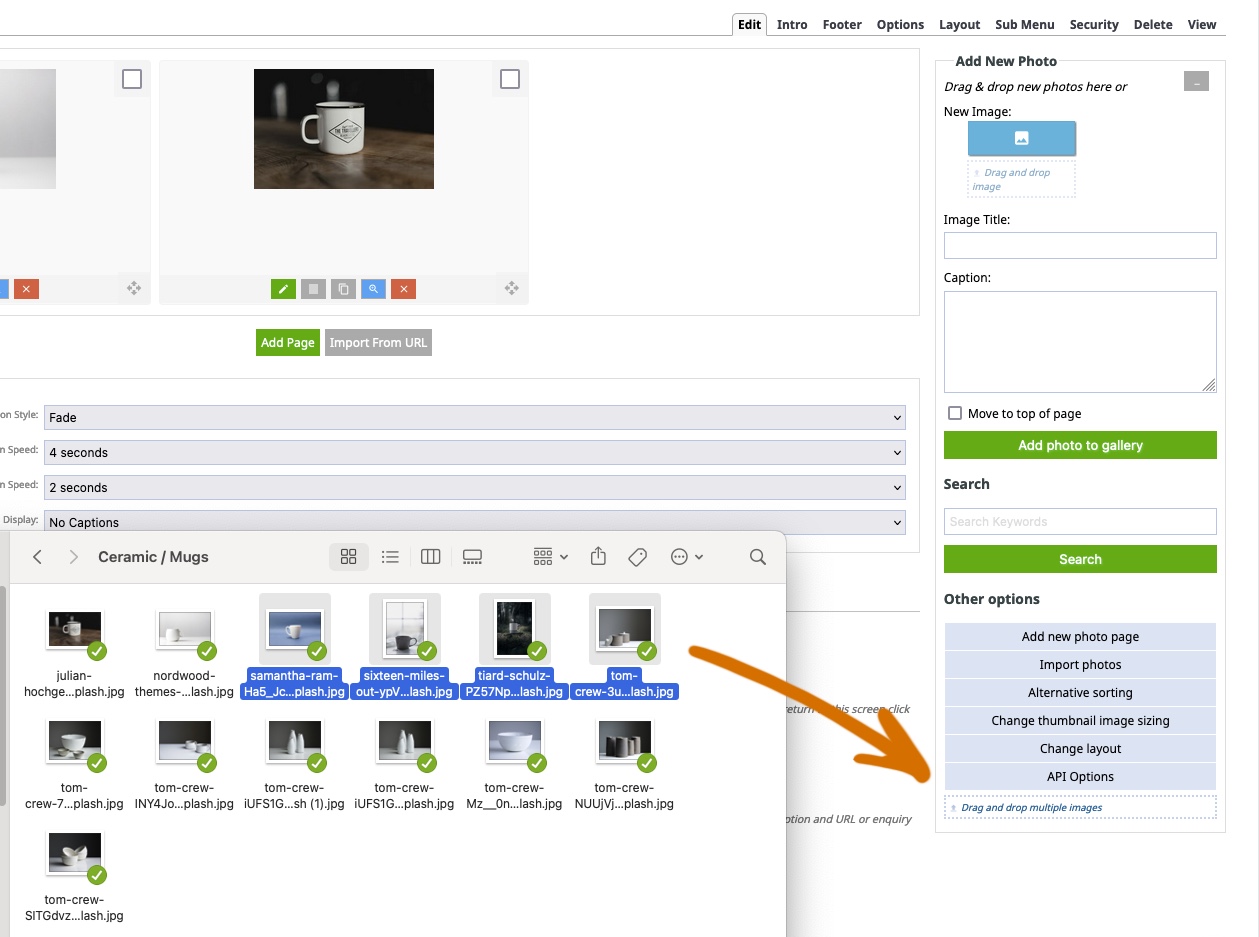
Adding Images in bulk via drag-drop
To quickly add a new images in bulk. Select the images in your computers file explorer and drag the file into the Gallery Page sidebar, dropping it in the DRAG AND DROP MULTIPLE IMAGES box found at the bottom of the sidebar.
Adding Images in bulk - other approaches
Via the IMPORT PHOTOS button found in the right-hand sidebar, you can access alternate options for importing photos.
- Import images from an external web page
- Import images from a local directory
- Import a Blog Page
- Import From CSV
- Import From Wordpress
Deleting an Image
You can delete an image by clicking the RED X icon next to the image. This will bring up a prompt to confirm deletion.
Deleting Images in bulk
To delete images in bulk check the checkbox found on each image, and from the options that appear in the right-hand sidebar, click DELETE ITEMS
Reordering Images
You can drag-drop reorder images by clicking and dragging the 4-way arrow icon found at the bottom-right of the image.
Changing the Gallery layout
Via the small tabs top-right you can change to a new Gallery format via the LAYOUT option. See Changing the page layout for more information.
Moving / Copying mages to another Gallery Page
To move images in bulk to a new Gallery Page check the checkbox found on each image, and from the options that appear in the right-hand sidebar, select the destination page from the dropdown under the Move checked items to another page (menu page) heading and choose the COPY or MOVE option.
Changing the Thumbnail Image size
You can change the Thumbnail Image size viathge CHANGE THUMBNAIL IMAGE SIZING button found in the right-hand sidebar or via the OPTIONS tab located in the small tabs top-right. The option to change can be found at the bottom of the page. See Custom Thumbnail sizes for for information.
Setting a maximum Image size on upload for the specific Gallery Page
You can set a max Image size via the OPTIONS tab located in the small tabs top-right. The option to change the Image Height and Image Width can be found in the IMAGE SIZING options bottom right of the page.
By default the image will keep its existing aspect ratio and fit within the sizing specified but if you would like the image to be cropped to the exact dimensions, click the MAINTAIN ASPECT RATIO checkbox.
Setting a global maximum Image size on upload for all Gallery Pages
You can set a max Image size via the OPTIONS tab located in the small tabs top-right. The button to launch the option to set global sizes can be found in the IMAGE SIZING options bottom right of the page.
The button is called SET WEBSITE DEFAULT IMAGE SIZES. You can set sizing for Gallery page images another images such as products and banner images.