
Customise Enquiry Forms
There are several types of forms in our CMS system, including member registration forms, enquiry forms, shopping checkout forms and customised forms.
This FAQ section only relates to customised enquiry forms.
These might be used for running surveys, questionaires, or simply customising an ordinary enquiry.
Instructions on how to setup custom enquiry forms in our CMS
First add an enquiry form, either as a page or widget on the page.
- Add a page of type "Custom Enquiry Form"
- Tick a box in the page options to add an enquiry form to the bottom of every page.
- Add a contact email address to your blog.
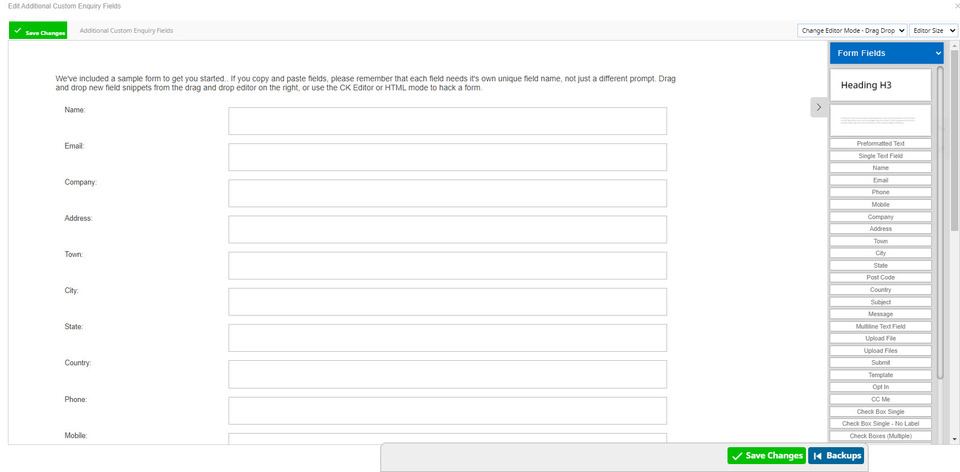
Add more questions, or customise the standard enquiry form
In order to add more questions, you can convert most standard enquiry forms to a custom enquiry form. This will display a similar layout to a standard enquiry form, where you can now add/remove fields, or change the wording as you like.
Our drag and drop editor allows you to drag form field snippets across from the right into your form, and makes formatting and reordering your forms easier.
The form must contain a Customer Email "from" field.
You must retain at least a "from" field (customer email) for your custom form, as it's expected that customers must always enter a valid customer email address when submitting an enquiry, and this is how we create a member record, and link the enquiry to their member record
The form should also have a from_name field, that becomes the customers name in a member record.
Note on Field Names
You can use any field name, but use the special field names for any common contact detail that you want saved into the "member" profile.
All other fields will only be stored with the "Message".
- Email: <input name="from" type="text" /> The email will be sent from this email address, and the user will be added as a member if not already a member based on this email address
- Phone: <input name="from_phone" type="text" /> Will be recorded in the members list
- Name: <input name="from_name" type="text" /> Will be recorded in the members list
- Company: <input name="from_company" type="text" /> Will be recorded in the members list
- Town: <input name="from_town" type="text" /> Will be recorded in the members list
- State: <input name="from_state" type="text" /> Will be recorded in the members list
- Country: <input name="from_country" type="text" /> Will be recorded in the members list
- Fax: <input name="from_fax" type="text" /> Will be recorded in the members list
- Group: <input maxlength="30" name="from_group" type="text" /> Will be allocated to this member group, limited to 30 chars
- Referred By: <input maxlength="20" name="from_referred" type="text" /> Who this member was referred by, use a dropdown box because limited to 20 chars.
File Uploads
- If you want to allow files to be uploaded and sent with the notification, then you need to change the page layout from layout tab top right, to a form type that supports file uploads. Only allow file uploads if you really want files. A maximum of 20MB applies to emails, so the maximum combined file sizes you can upload is about 15MB due to the way files are inefficiently encoded in emails.
Optional Hidden Fields
Use optional hidden fields for other control
-
Hide the parameter list in the notification email if you're using a formated template
Adding additional custom form fields
You don't have to use spaces, but it is helpful to use some kind of field naming convention so that it is easier to match the fields up later for validations or Notifications.
Notifications and Thankyou Templates
- you can use any of your field names from the enquiry page, using square brackets... eg [from] or [from_name].
- The field names must exactly match, including any spaces, upper/lower case etc.
- Special note: Checkboxes are anoying, as many browsers don't send anything through if they are not ticked. So if your template has a field for a checkbox, it may not be replaced with nothing, the field declaration with square brackets will remain... However, if you add this field into the validation list, with no validation, then it will be blanked out nicely in any notification emails..
- If you have customised your notification template, you may still see the full field list in the footer. To remove that, change the "page layout" to the one dedicated for custom notifications, or include a hidden field in your form "templateOnly"
Validation
- Validation of mandatory fields can be achieved, refer to the notes at the bottom of the first editor screen.
- The Email address on the contact details page is the default recipient address. The Notification email address in the OPTIONS of the page is the way to override the recipient address. You can not override the recipient address with any fields sorry, but do checkout our new "tell a friend" options.
Block spam messages by keyword
- You can block bad words in the block bad words area of our CMS.
- Additional instructions in the editing area itself... eg for javascript validation etc.