Snippets and spacing - Margins and Padding
Using the Style Editor popup, you can change the spacing of, rows, columns and text as needed.
What is Margin and Padding
Margin in the spacing OUTSIDE of an element, Padding is INSIDE the element.
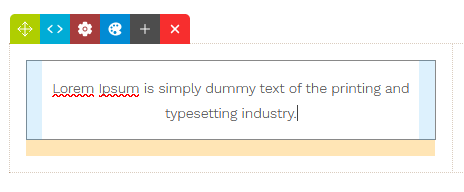
In our example above of a black outlined content box. It has margins set on the bottom (Orange) and Padding inside left and right (blue) preventing the text from touching the edges.
Viewing the current margin and padding sizes via the Style Editor
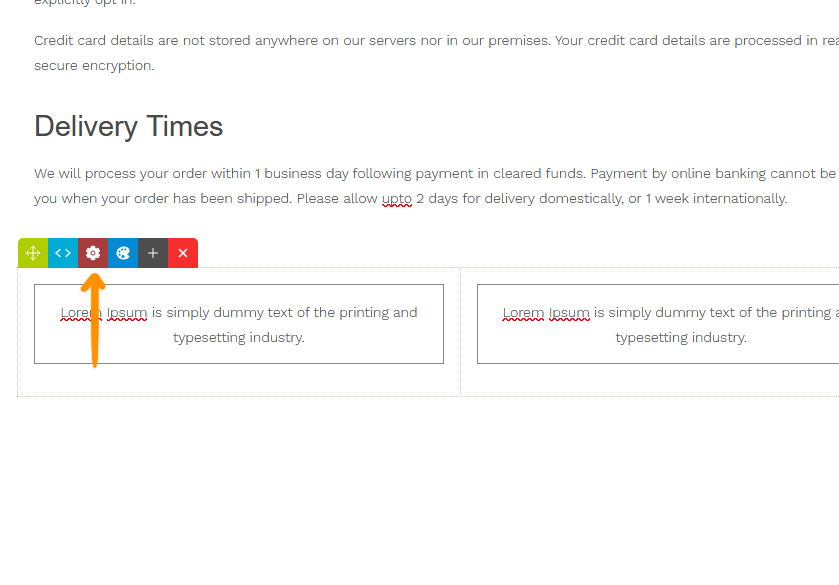
Click the snippet you want to edit and click the RED COG icon to launch the Style Editor
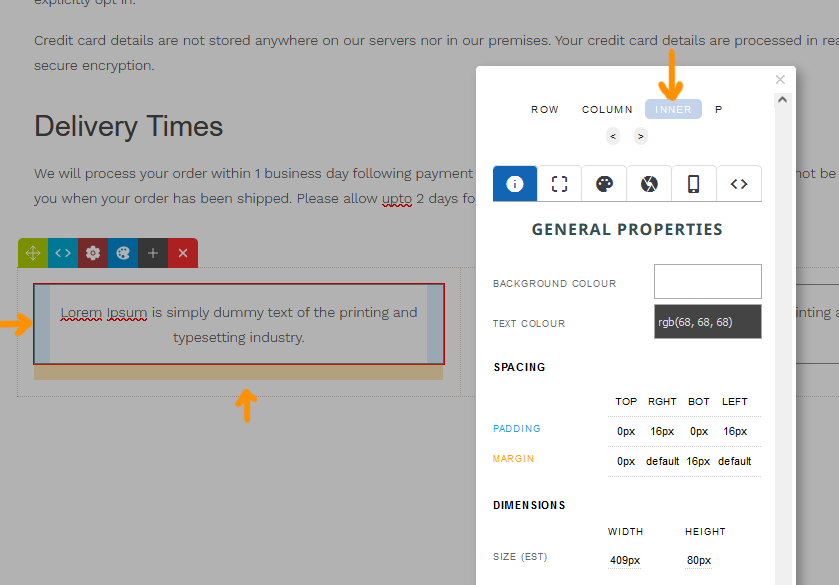
You can hover your mouse over any of the elements in the top nav to visually view margin (orange) and padding (blue) values for the first element of that type.
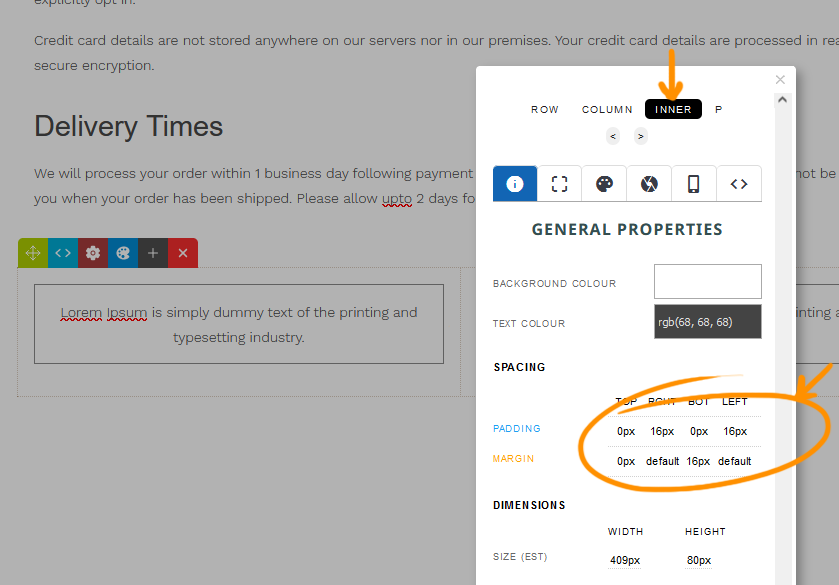
Click the required element in the top nav to get the properties for the element. This includes margin and padding values.
To change values, click either the padding values or margin values to quickly jump to the padding editor or click the [] spacing tab in the tabbed menu.
Changing the current margin and padding sizes via the Style Editor
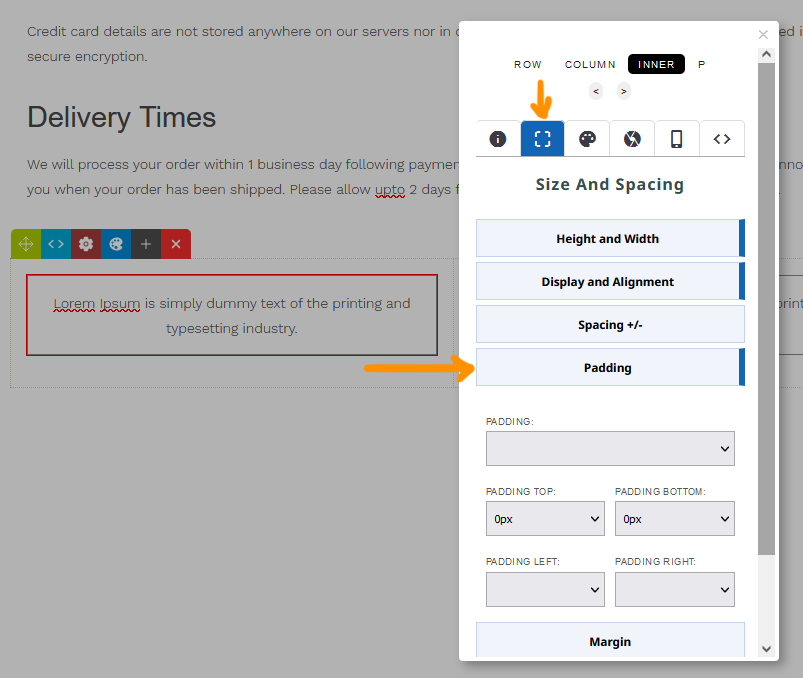
To set a value via dropdown, click the SPACING TAB [ ] in the top tabbed area, then choose the margin or padding section.
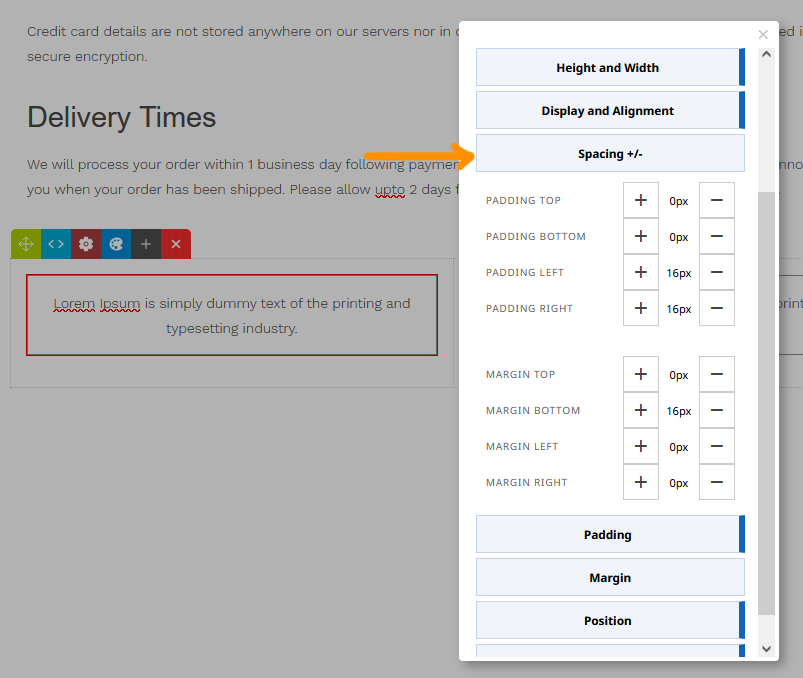
Clicking the Spacing +/- section will give you the option to incremenatally increase or decrease the padding, visually changing the element as you update. You can also click into the value e.g. 16px to set a specific number.
Adjusting margin and padding on mobile
To learn about changing margin and padding using the Mobile Styling panel - see Mobile Formatting
Adjusting margin and padding using Margin / Padding Mode (CTRL + ALT + B)
To make quick adjustments to snippet block content you can look to use the Margin / Padding Mode available via the Properties Inspector or via keyboard shortcut.
You have access to drag handles for Padding (both horizontal and vertical) and Margin (vertical only)
Keyboard Shortcuts
When dragging the handles you can hold down a key to affect more than just the current element.
|
Keypress |
Action |
|
CTRL (PC) / CMD (MAC) |
Apply drag size to opposing vertical / horizontal at the same time |
|
ALT (PC) / OPTION (MAC) |
Apply drag size to all other elements of the same type found in the snippet |
