
If you would like to send and receive email from a mailbox hosted with us via your Gmail account you can set it up as a third party account within Gmail.
You can choose to both check for new messages from your mailbox and send mail as your mailbox e.g test@mydomain.com, or one on the other.
- If you choose to only Send Mail as: you will need to set up another way to check incoming emails.
- Setting this up requires you have an active mailbox set up in the CMS on a live hosting plan.
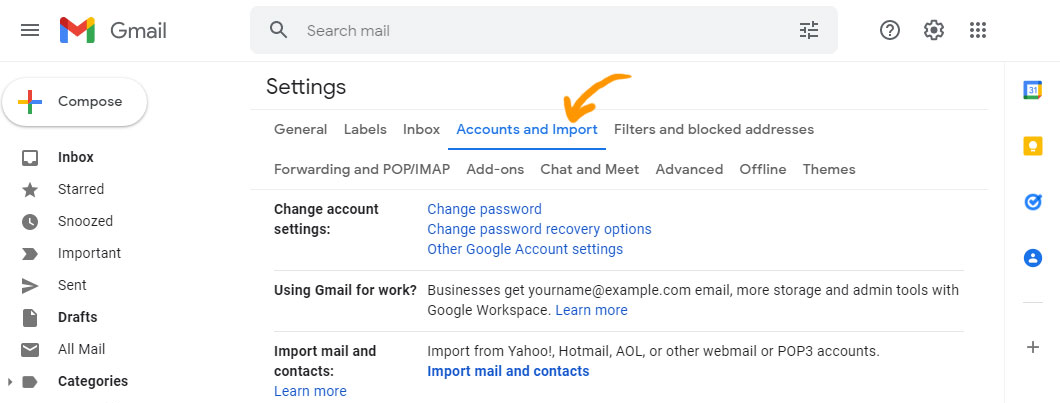
Login to Gmail and Navigate to the Settings > Accounts and Import area
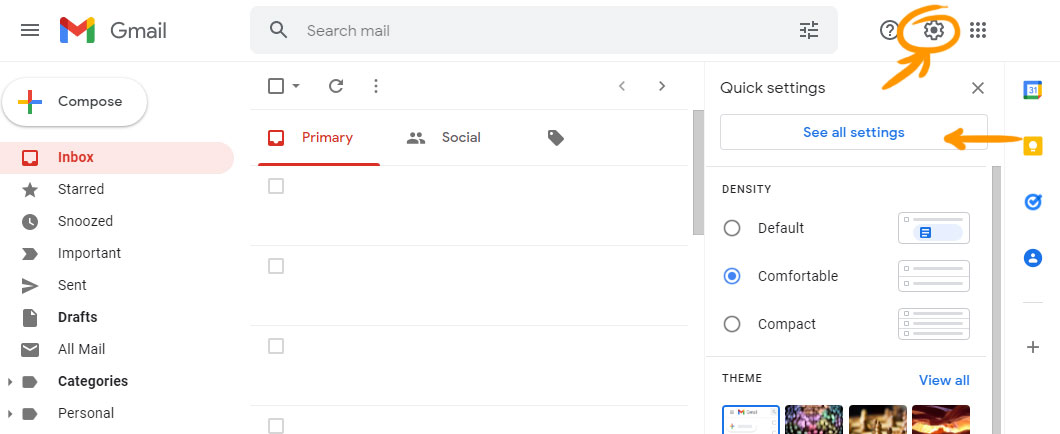
- Once logged into gmail - click the COG icon top-right (circled),
- Then click the button SEE ALL SETTINGS in the sidebar that appears.
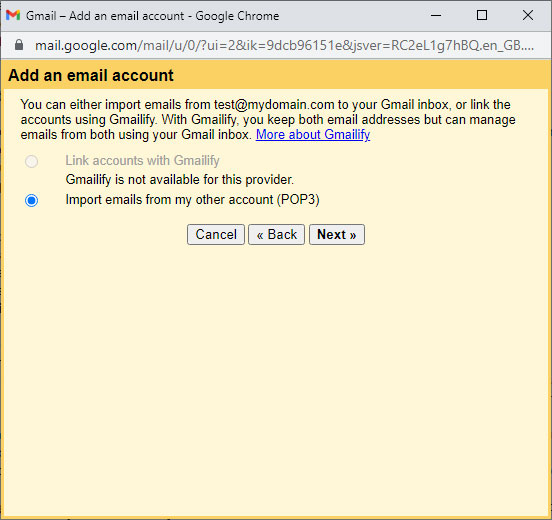
- Click on ACCOUNTS AND IMPORT in the top settings options. (screenshot below)
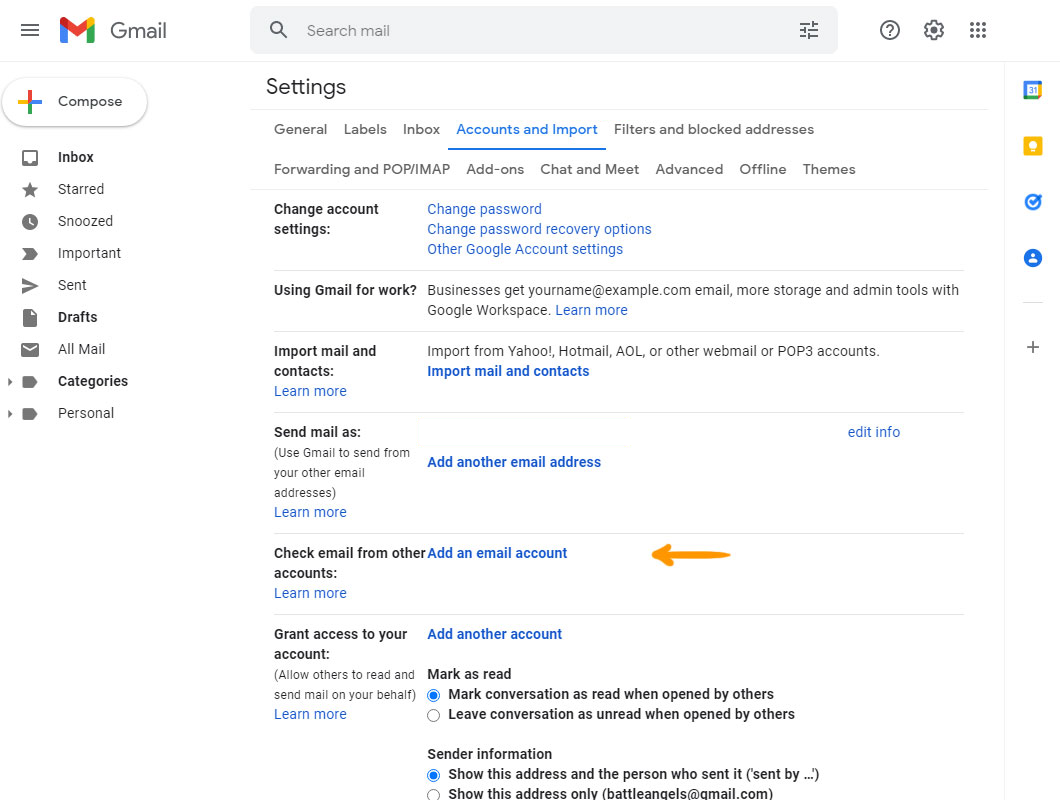
- Then click CHECK EMAILS FROM ANOTHER ACCOUNT > Add an email account (screenshot below)
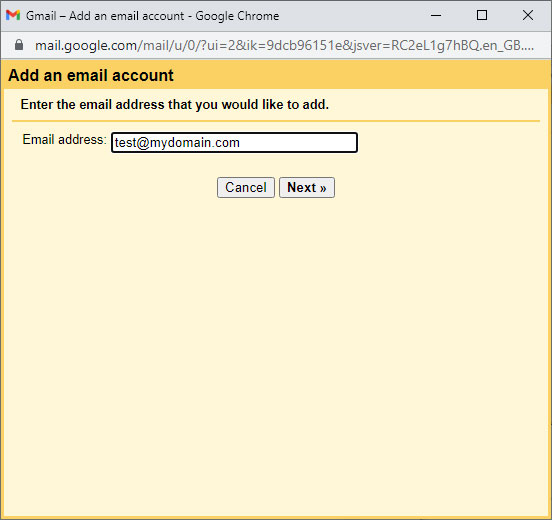
Adding your Email account
- Specify your email address of your mailbox and choose to import emails POP3
- If the setup asks if this account is an alias, uncheck the box Treat as an alias.
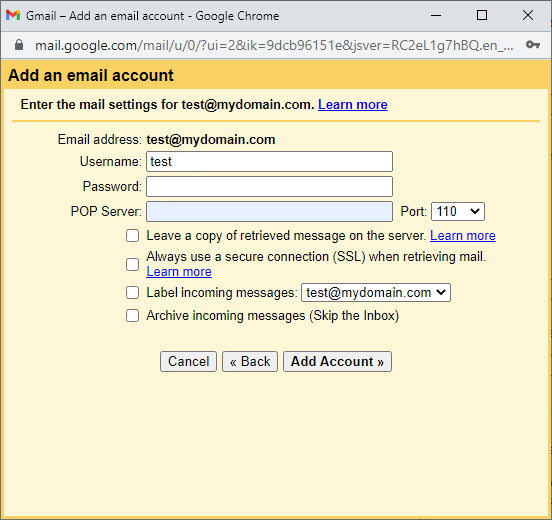
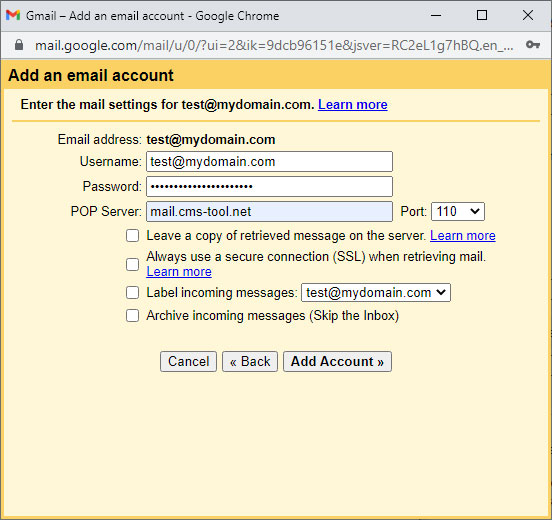
Add your mailbox credentials - username, password, incoming mail server as set in the CMS
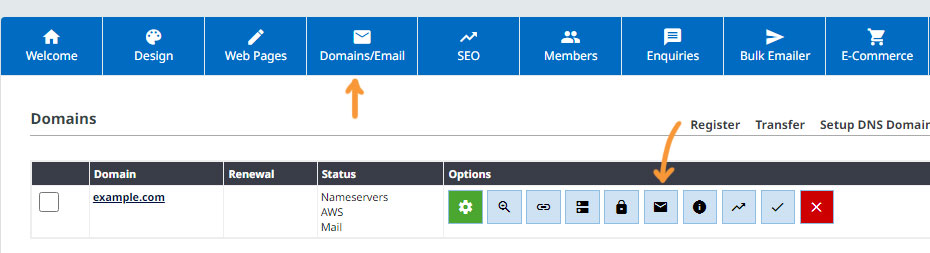
From here you will need to enter your email settings as set in the DOMAINS / EMAILS area of the CMS
Find your mailbox settings in the CMS via the DOMAINS/EMAIL area.
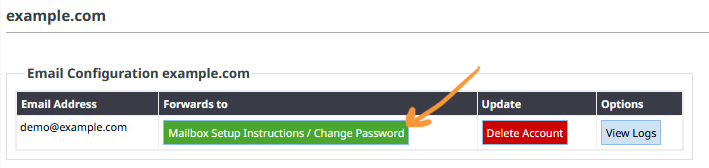
Each mailbox listed has a Mailbox Setup Instructions / Change Password button where you can find the server settings, username and password required to complete the setup.

- Add the Username - your full email address as shown in the Mailbox Setup Instructions
- Add the Password - your password as shown in the Mailbox Setup Instructions
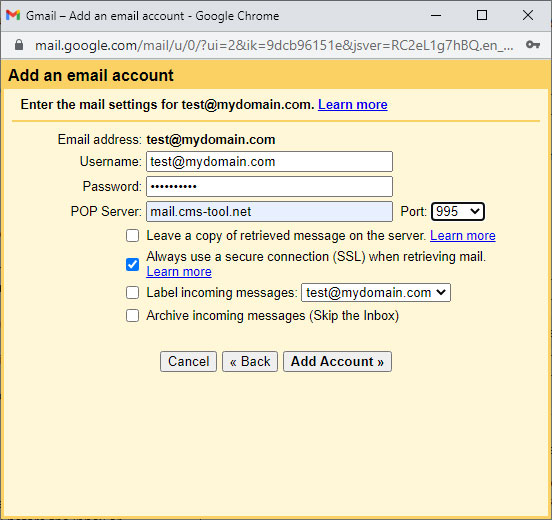
- Add the Pop Server - our incoming mail server as shown in the Mailbox Setup Instructions e.g. mail.cms-tool.net
- If you want to keep a copy of the messages in your webmail with us as well as gmail, check the box Leave a copy of retrieved messages on the server.
- If you want to use a secure connection, change the PORT dropdown to 995 instead of 110, and check the box Always use a secure connection (SSL)
Mailbox setup credentials examples
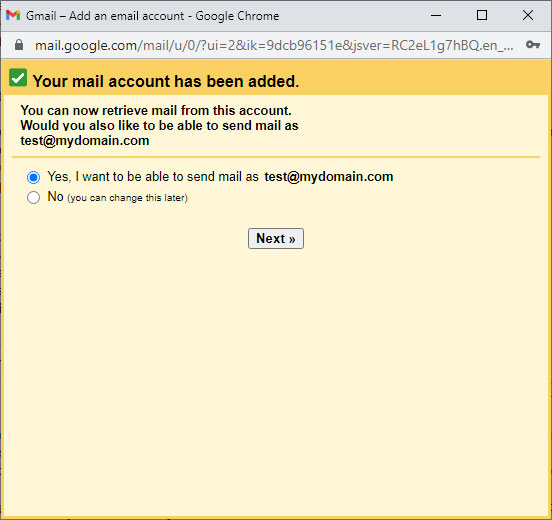
Once verified you will be able to move on to setting your sending / outgoing mail settings (optional)
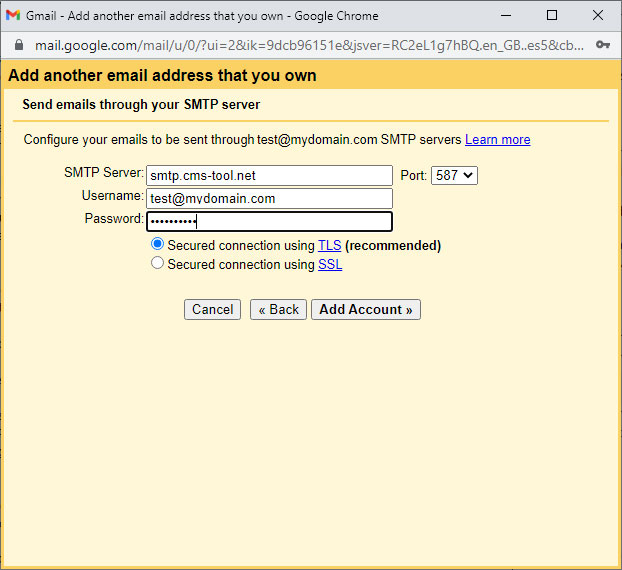
Setting up Outgoing mail / Send Mail As
Enter the relevant detail leaving Treat as an alias unchecked. (screenshot below)
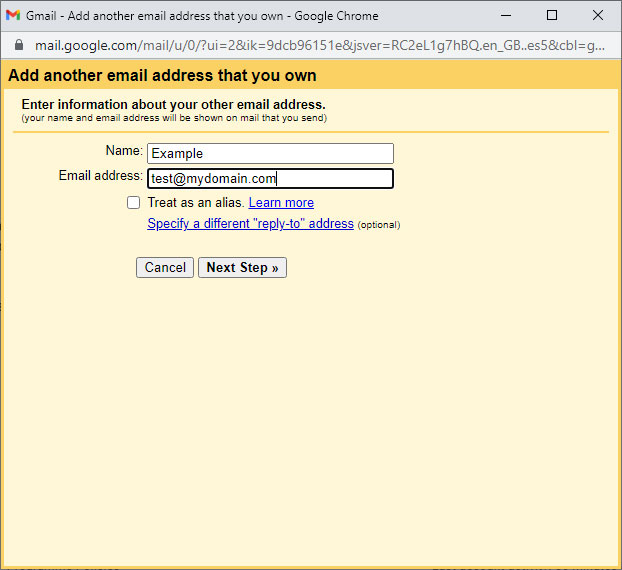
Use TLS with port 587
You will then need to verify the connection works using a link or verification code in a sent email.
This email will be sent to your email account managed with us.
Confirm verification via CMS Webmail
If you do not have the account set up with an email client, you can access the verification email via webmail via https://webmail.cms-tool.net/roundcube/ You will need to enter your email address and password to log in and access your email.